

 By Jerry Long, February 28, 2011
This week I share a set of trophy photo tips that I recently had the opportunity to write for an archery manufacturer.
The following is a compilation of tips from a wide variety of sources including my own hard-learned experiences, Carrie Zylka of Zylka Photography and Carrie’s Fist Full Arrows Blog, my friend and Super Slam Bowhunter Gary Martin, my virtual friend and fellow bowhunter Gene “hntswbow” Drinkman and various other sources here and there. I’ve included it as a media download, here – dvMA’s Trophy Photo Tips, so you can save it, print it and carry it with you if desired.
As bowhunters we create memories of a lifetime in the release of an arrow and the click of a camera. However, there is a very thin line between a carefully composed trophy photo and an unusable, tongue-sticking-out- blood-everywhere photo in the back of a dirty pickup truck. The following tips will help ensure your trophy photos can be safely shared with friends and family, be submitted for use by magazines and remember that outdoor experience in a positive light for a lifetime.
My first deer – what a memory of a lifetime I have to record the event.

*Become familiar with your camera before the hunt. When the trophy is on the ground is not the time to try to figure out how to make the flash work. Digital point and shoot cameras tend to be easier for you and your friends to use and most current models produce quality results.
*Always have your camera with you. You likely won’t regret carrying it, but you will regret leaving it behind. Always have a spare set of batteries and spare digital media card available. Lithium-Ion batteries are lighter than standard batteries. If you hunt alone a small, packable tri-pod like the Gorilla Pod or Targus Grypton is recommended. Put all these things on your equipment list so you don’t forget them.
The Targus Grypton tri-pod and a Canon digital point-and-shoot camera.

This photo was taken using the Targus Grypton tri-pod.

*Always shoot the photo with the sun to the photographer’s back and the subject facing the sun. Ball caps often create face shadows – remove the caps or use the camera’s flash to correct.
This photo of my first turkey was taken with the sun to my back which washed it out, the camera was a complicated digital SLR and I didn’t review the photo before quiting the field. Not a great keepsake of a great trophy.
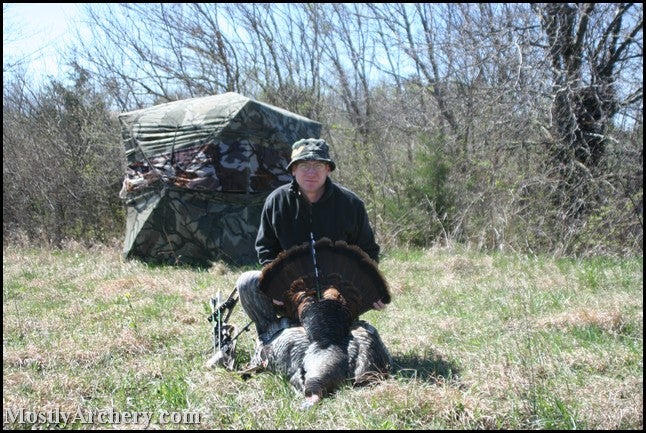
Look at those shadows on the faces. I knew what needed to be done, but I couldn’t remember how to make the camera flash in full sun until on the way home from Africa.

*Take trophy photos before field-dressing in a natural setting near the kill site, but away from large blood spots. Avoid buildings, cars and other unnatural objects as backgrounds as well as the backs of trucks and the game gambrel.
Bucky doesn’t look so good with his belly cut open and his hide tinged red.

A lack of background in this example gives little perspective.

*Stick the tongue back in or cut it off. Carry a small rag or towel (or use grass and leaves) to clean up blood around the mouth and entrance/exit wounds. Remove any protruding arrows or broadheads. If possible, bend the animal’s front legs and feet under the brisket and position the rear legs under the abdomen in a similar natural position. Position your body behind the animal.
Rigor Mortis had set in by the time the picture was taken so a natural pose was not possible.
I didn’t notice the tongue sticking out until it was too late.
*Clear all grass, twigs, etc. from the area in front of the animal.
The angle was good, the wound was clean, but that darned multi-flora rose was right in the way. I caught it and re-shot.

I still could have trimmed some more, but this is better than the above photo.
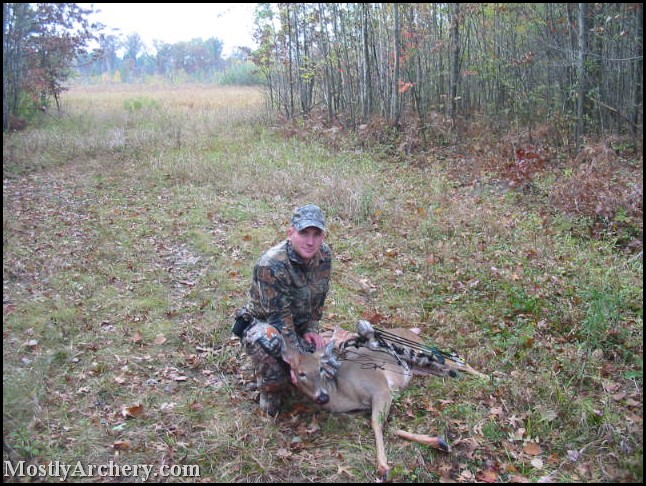
*Avoid placing hands in the foreground or on the forward portion of the rack or head – the hands will look oversized, may obscure part of the rack and will distract from the animal. For instance cradle a whitetail’s rack with palms or finger tips on both sides near the back.
My hands are covering the buck’s rack – not that he is a giant or anything…
*When composing the picture leave an amount of “negative” (clear) space around the hunter and animal to allow for proportional cropping later on (shoot wide, crop later).
This picture looks fine in digital format, but when printed either the top or bottom is cut off.
*Take several photos from multiple angles with and without flash and review those to make sure the desired results are obtained. Shots from a low-camera position enhance the animal’s size. It is impossible to take too many photos with a digital camera.
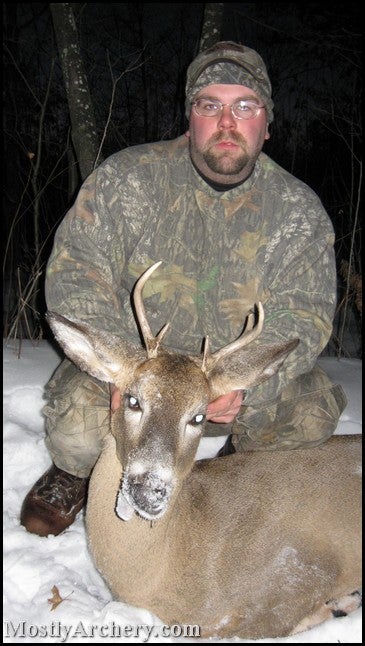
This angle emphasized the doe’s size.
The photographer didn’t know how to use the camera or take a trophy photo. I didn’t review the photo until it was too late.
Doofus photos really don’t have any use…

As you can see I didn’t need to search any further than my hard drive for bad picture samples. Hopefully your learning curve is much shorter than mine.
happy hunting, dv
happy hunting, dv
If you liked this blog you may like the following:
- Hamming With Game Cams
- Photographing Your Hunting Trophies
- Best Of Trail Camera Photos – May/June 2009
- A dv Gear Review – Moultrie D40 Game Camera
- A dv Gear Review – Scout Guard 550 Game Camera
- A dv Gear Review – Stealth Cam 12 Volt Battery Kit
- People Pictures From The Archery Trade Association
Feedback, Questions & Comments
I’d like to hear your tips, feedback, comments or questions. Please leave them below.
Subscribe
Like this blog? Want to be notified of updates? Subscribe via RSS feed by clicking here.

Copyright © Jerry E Long, 2009-2011